
SketchUp 101
I use SketchUp quite a lot. While BIM is the final presentation model, SketchUp is the down and dirty study model. I equate SketchUp as the electronic version of chipboard and BIM as electronic basswood. Anyone that reads this blog will know that I am a firm believer in actual physical models. However, I also realize the benefit of virtual models- a chipboard model is tough to attach to an email. Typically I’ll create Schematic Design entirely in SketchUp, except for the floor plans which I’ll hand draw or use 2d CAD. You can create the floor plans in SketchUp, however, I’ve never been satisfied with how long it takes to achieve a decent ‘graphic.’ With the SketchUp model, I’ll generate elevations, roof plans, sections, and various perspective views. It’s a quick and a great tool for visualizing in three dimensions. I’ve been using SketchUp since, well… um… let’s just leave it at beta.

I’m often asked about how to use SketchUp, or more typical, part of a discussion about the fear of learning SketchUp. SketchUp is an invaluable design tool and one of the easiest programs to learn. As such, I’m offering up some tips and general information for those looking to get started in SketchUp or those who want a brief refresher. Note that this post is based upon Google SketchUp version 8.0.14346 and may differ slightly from the most current Trimble version; it is also not meant as all encompassing, but rather a broad overview of some general tips and information.
The Basics
1. Resources:
a. There are numerous resources online to learn SketchUp, Start at the Help Center, here you’ll find numerous tutorials and information: http://help.SketchUp.com/en
b. From within SketchUp, Instructor teaches how to use a tool when you select it- Go To: Window>Instructor
c. Click here to download a PDF-> Quick Reference Card for SketchUp
2. Toolbars- these are the basic toolbars that should be in your workspace:
a. Getting Started- Go To: View>Toolbars>Getting Started
b. Large Tool Set- Go To: View>Toolbars>Large Tool Set
c. Styles- Go To: View>Toolbars>Styles
d. Layers- Go To: View>Toolbars>Layers
e. Shadows- Go To: View>Toolbars>Shadows
f. Standards- Go To: View>Toolbars>Standards
g. Views- Go To: View>Toolbars>Views
3. Large Buttons, makes toolbars easier to read- Go To: View>Toolbars>Large Buttons
4. Axis- each axis has a solid line on one side of the origin and a dotted line on the other, the axis lines orientation is:
a. Solid Blue line extends up from the origin
b. Dotted Blue line extends down from the origin
c. Solid Red line extends East from the origin
d. Dotted Red line extends West from the origin
e. Solid Green line extends North from the origin
f. Dotted Green line extends South from the origin
5. Shortcut keys- when using the drop-down menus at the top, pay attention to commands that have a letter to the right, those are shortcut keys that you can use from the keyboard.
Setting Defaults and Saving Your Own Template
1. Open a new file and set all settings below to your own liking.
a. Setting the location and solar orientation
i. Go to: Window>Model Info>Geo-location * You’ll have the option to geolocate or manually locate the model, geo-locating is more precise. Also note, location should be updated per a specific project location.

b. Styles
i. Go To: Window>Styles select the middle tab Edit and the first box Edge Settings, confirm the Display Edges box is checked, turn off all other options.

c. Face
i. Go To: Window>Styles select the middle tab Edit and the second box Face Settings, confirm the Front color and Back color are set to white. Confirm the Enable transparency box is checked and set to ‘Nicer.’

d. Background
i. Go To: Window>Styles select the middle tab Edit and the third box Background Settings, set the Sky and Ground colors to your liking.

2. Saving your own template
a. After selecting the settings above, save the drawing.
b. Go to: Windows >Preferences>Template and Browse to find the file you just saved. Once this is set, whenever you open a new file, your settings will automatically be set in the model!
Modeling Basics
1. Always use the axis to draw Everything. Use the arrow keys on your keyboard to lock directions. The up and down arrows will lock the blue axis. The right arrow key locks the red axis and the left arrow key locks the green axis.
2. Make use of Groups and Components.
a. Creating a Group is simply a way to combine several objects together, into one ‘piece.’ For instance you can create a window that is comprised of an upper and lower sash as well as glass. You can than make a group out of the ‘pieces’ which than makes it easier to edit and move it within the model. Groups can be copied and edited.
b. A Component is a type of group that when copied and repeated, if one component is edited all of the other components will change as well. This is useful for windows that are used repeatedly and is very helpful when creating units for multi-family buildings. For instance, you could create a Double Hung window unit and place it 40 times in your model, if you than edit one component to be a casement window, the other 39 update as well. Components can also be mirrored using the Flip command. The mirrored components retain their definitions, and are updated whenever an un-mirrored version is updated.
c. To create a Group or Component, select all the objects that you want included, right-click the mouse and select Make Component or Make Group, it’s also found under the Edit drop-down menu at the top of the screen.
d. Groups and components can be edited by double clicking them.
3. When drawing shapes and lines, you can key in actual dimensions, look at the bottom right of the screen for the dimensions dialogue box.
4. The basics of modeling are to draw shapes, select from the toolbars or Go to: Draw drop-down menu. Than you manipulate the shapes by the Push/Pull tool and various others selected from the toolbars or the drop-down menus.
5. Linear Arrays create multiple copies of entities or geometries (use it for posts at an on-center spacing, siding, beams, etc.) To create an array:
a. Select the entity to be copied
b. Select the Move tool, press and release the CTRL (PC) or Option (MAC) key, the Move tool icon should now have a ‘+’ sign.
c. Click on the selected entities to copy and move your mouse to copy, easiest if you key in dimension spacing, click destination point.
d. Type a multiplier to create additional copies, i.e. typing 4x will create a total of 5 copies, the original entity and the 4 copies.
e. There are several other ways to create linear arrays, as well as radial arrays, search online or use the SketchUp help forums.
6. Use Layers, they make it easier to control the visibility with-in the model and group similar ‘pieces.’ From with-in the Layers dialogue box select the ‘+’ sign to create a new layer and name it as you wish. From this box you can also select which layer is ‘current’ and all modeling is currently being placed in.

7. Use the Tape Measure tool to create drawing guidelines, it can be accessed either from the toolbar button, Go to: Tools>Tape Measure, or by pressing ‘T’ on the keyboard. After a while your model may have a lot of guidelines, you can delete them by, Go to: Edit>Delete Guides
8. You can import files to use as site plan or floor plan references, Go to: File>Import and select the type of file to import. You can scale the imported file by using the measuring tool to measure a known dimension and scale accordingly using the Scale tool.
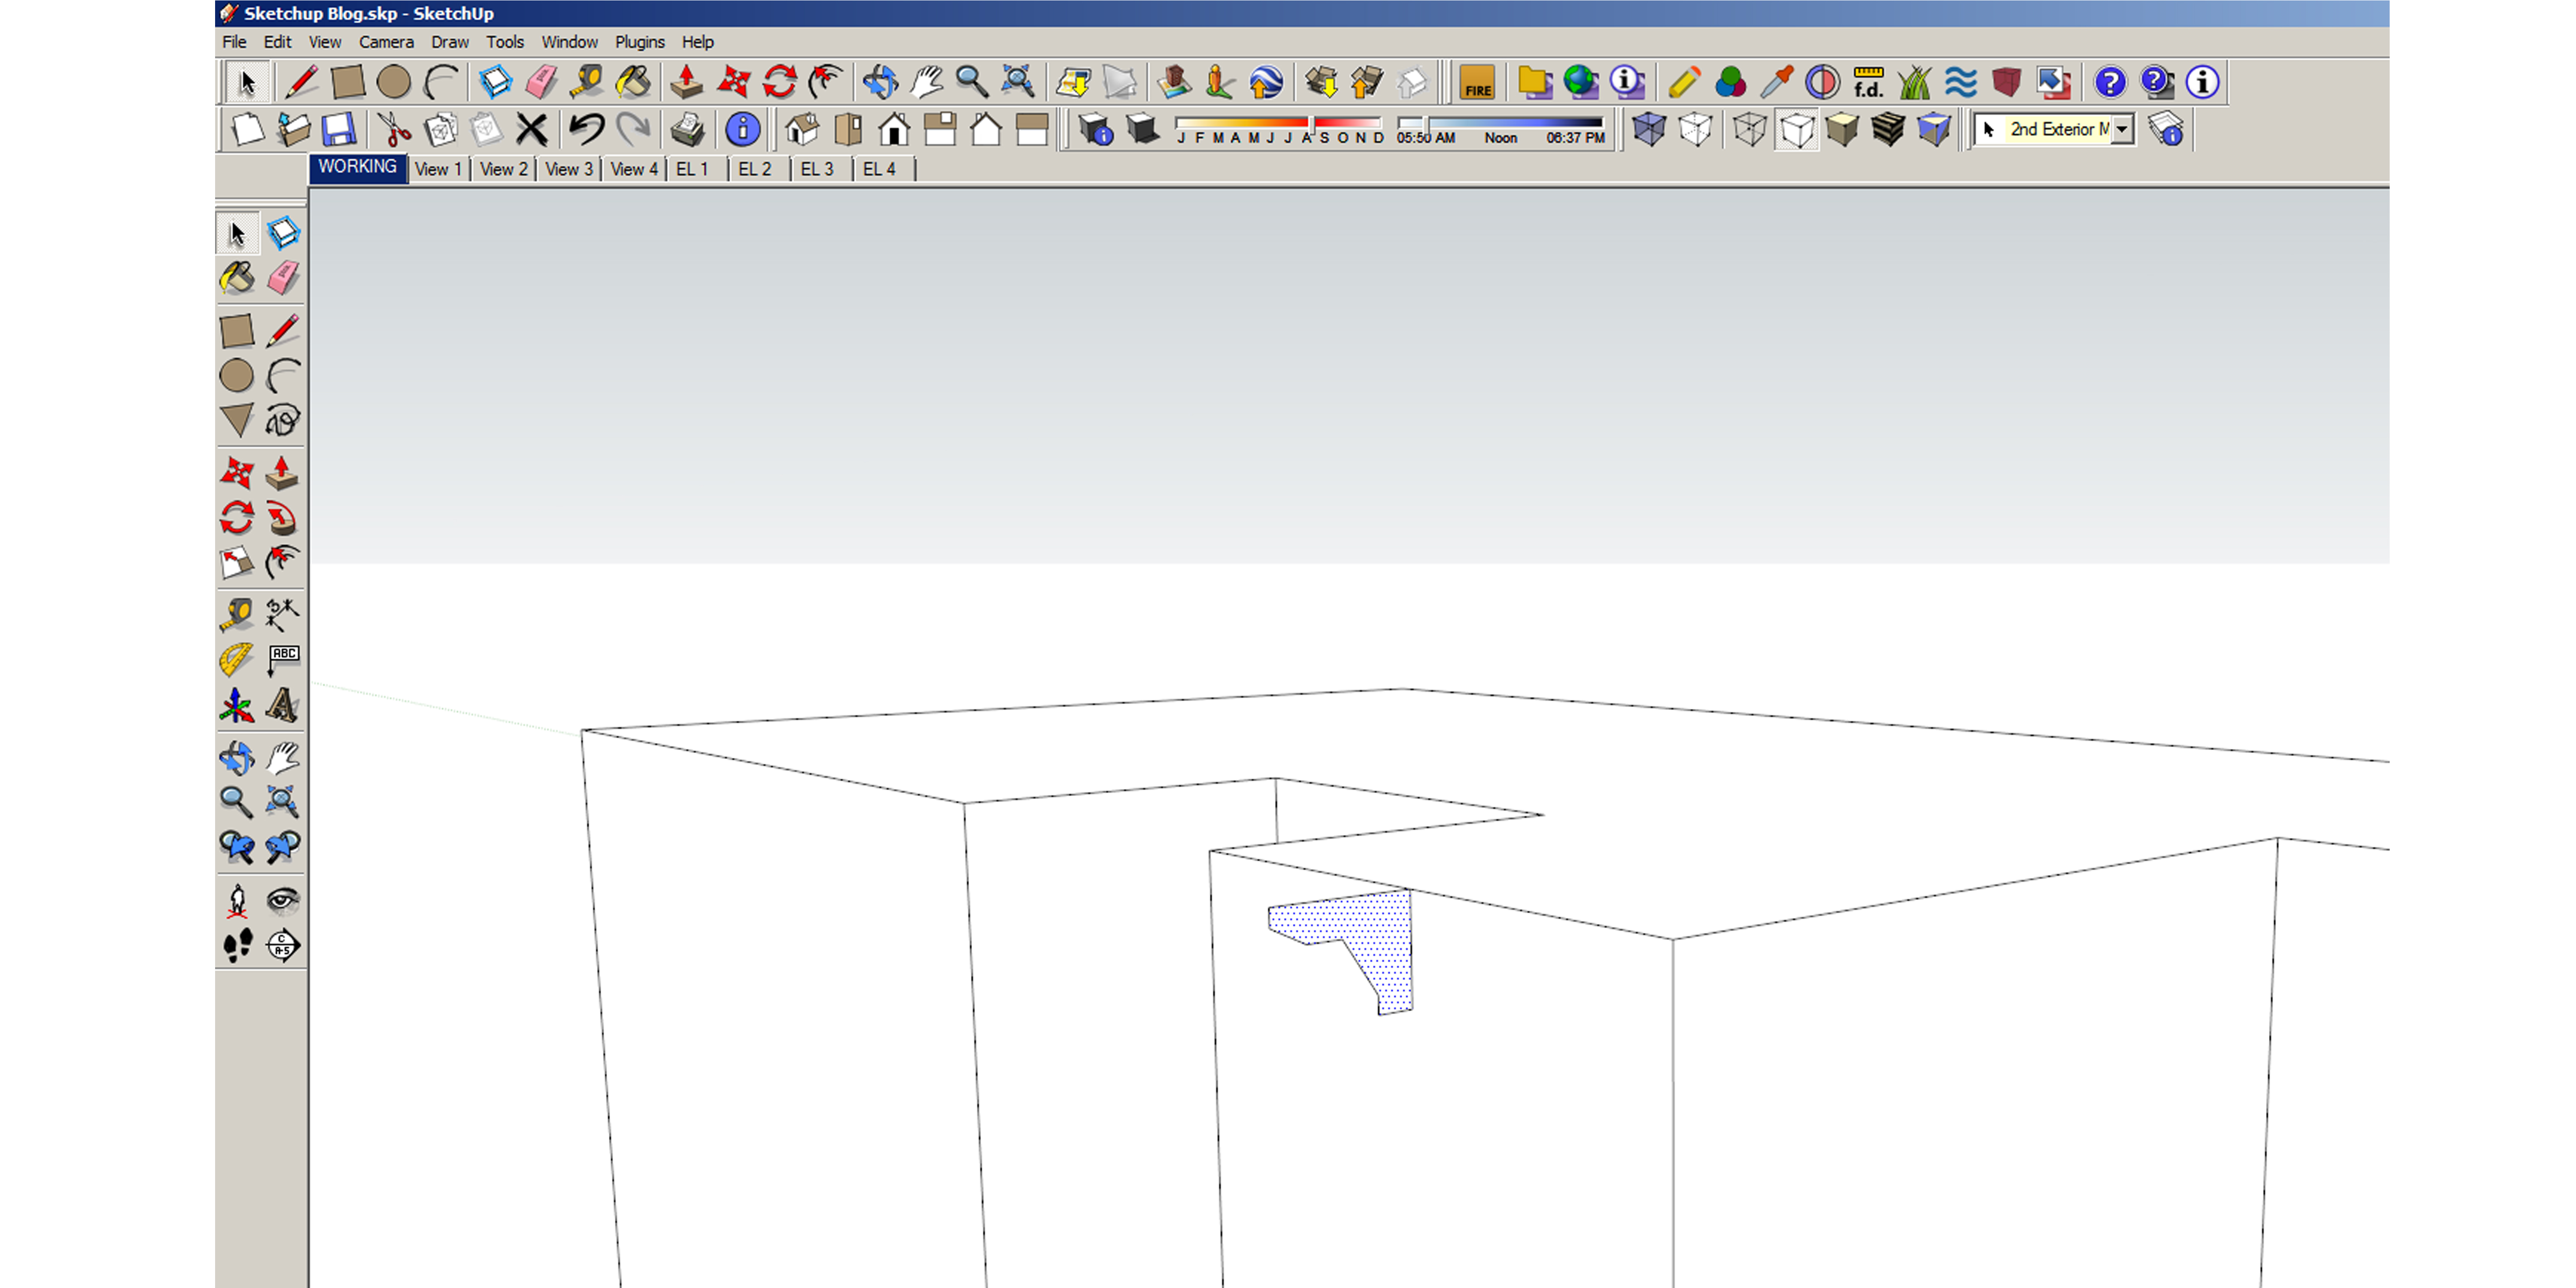
9. The Follow Me tool is a great time saver for creating moldings. The tool will take any multi-sided plane (e.g., a section through a piece of molding) and extrude it along a line or curve. Draw the shape you want to extrude. Then select the Follow Me tool, click on the shape and drag it along the path you want it to follow.
Draw the shape you wish to extrude:
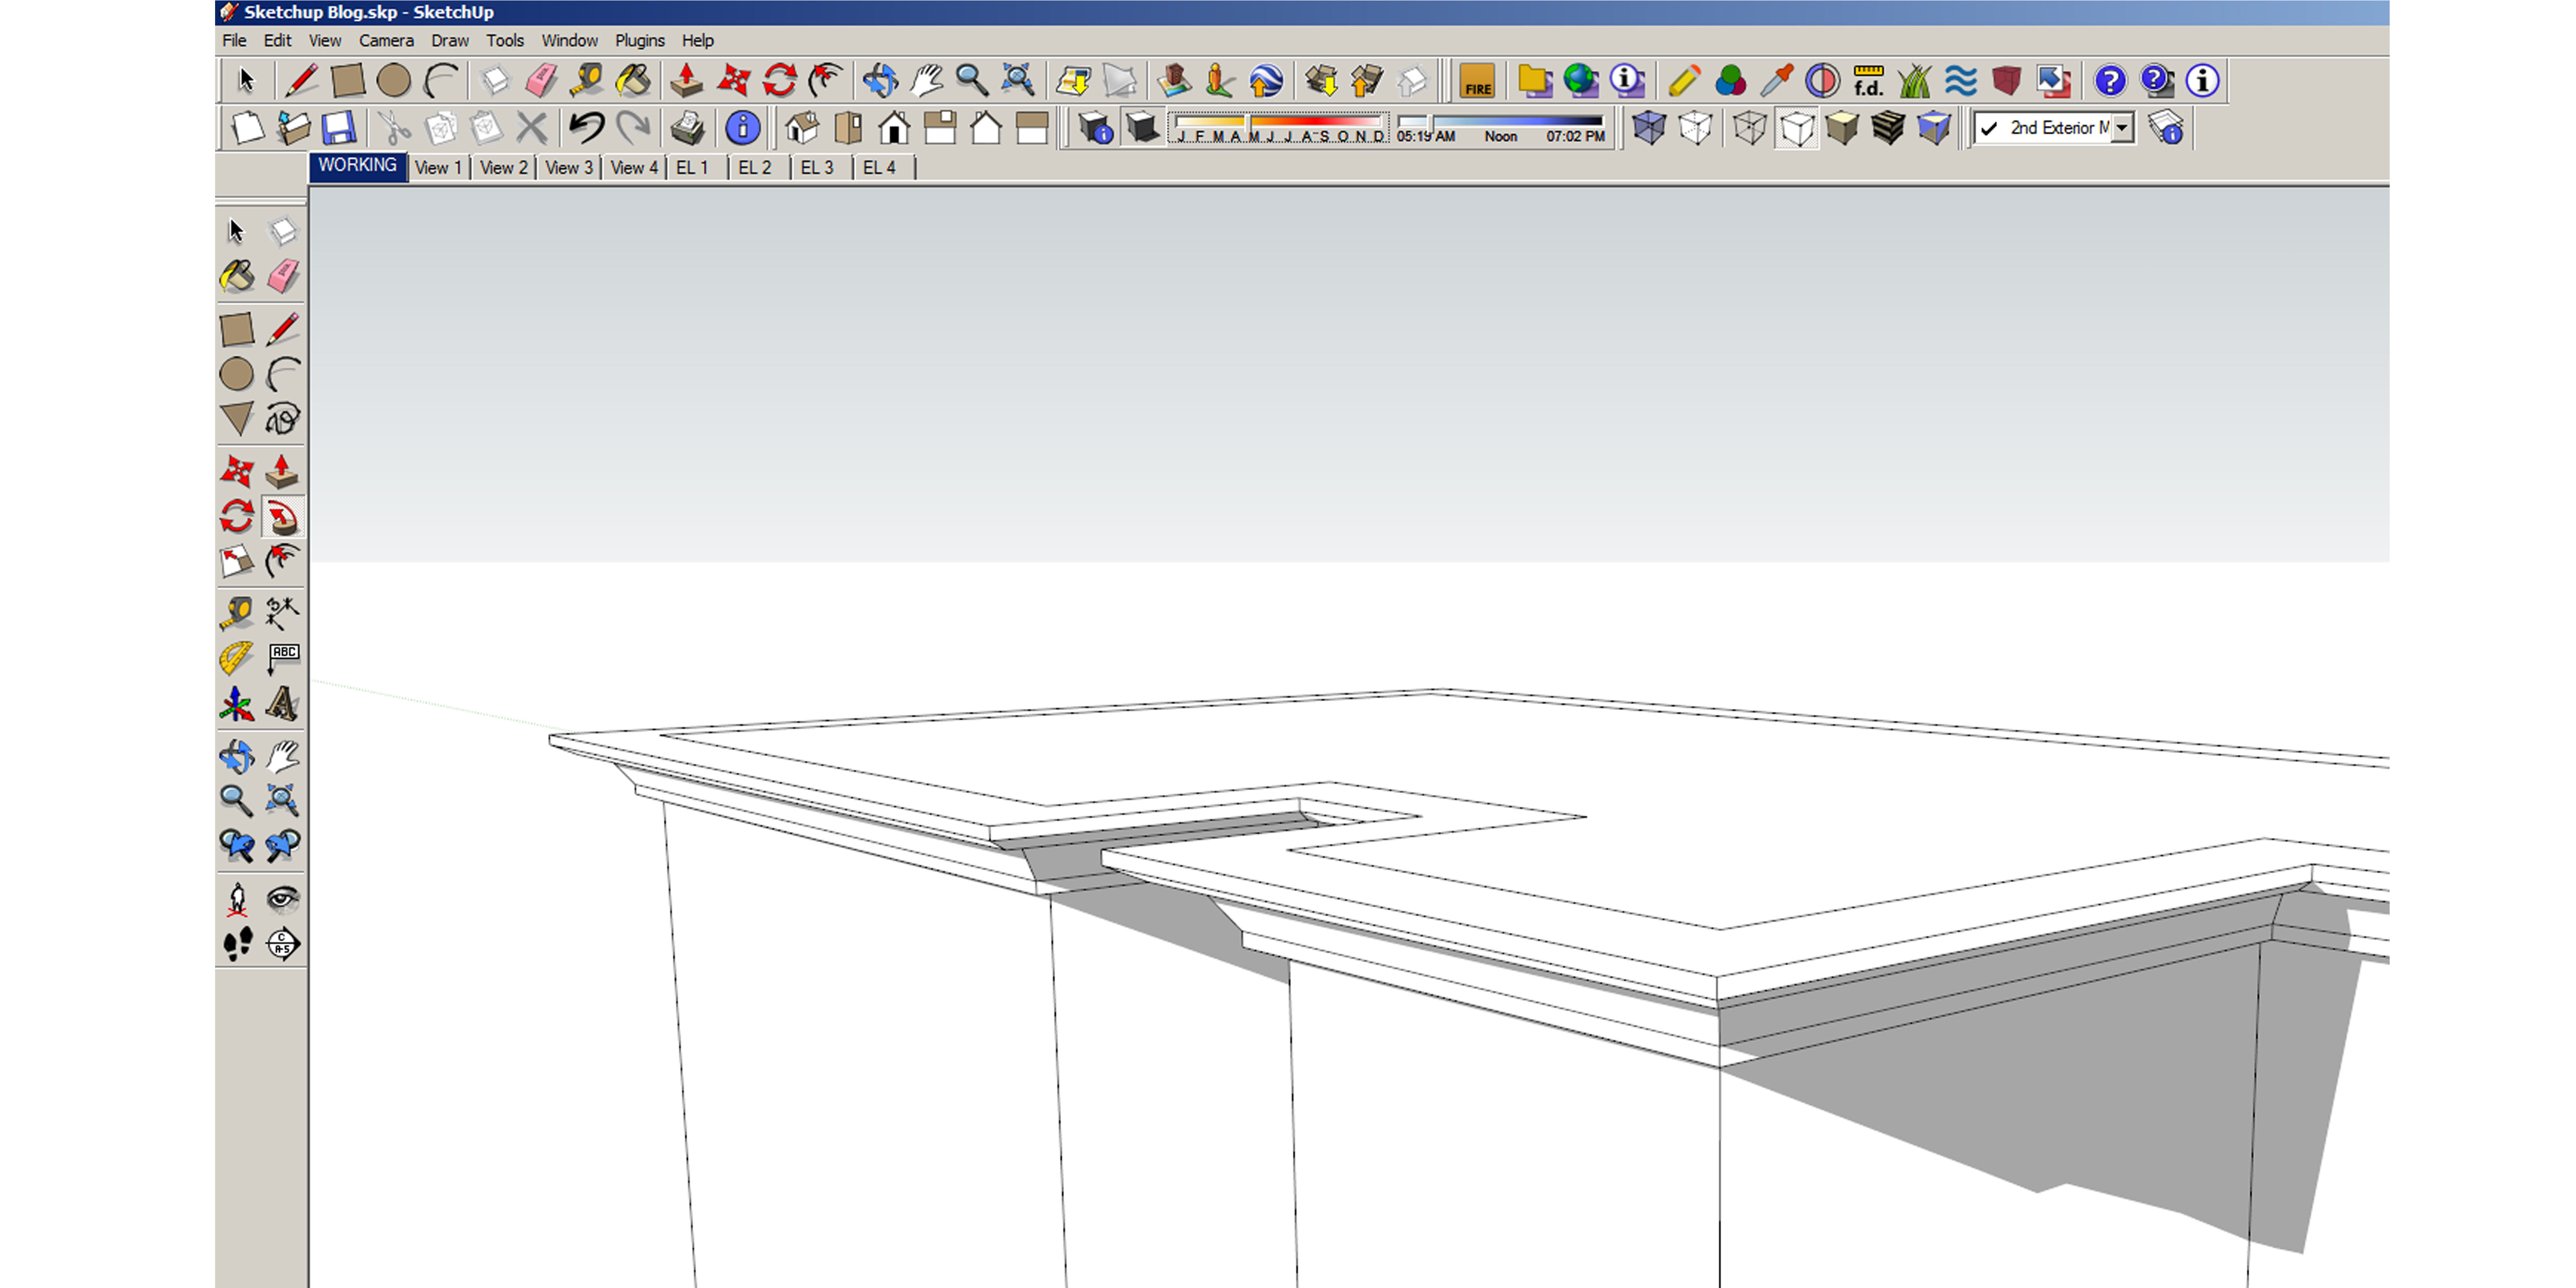
Select the Follow Me tool, click on the shape and drag along path of extrusion:

Complete the paths loop:
10. A lot of time can be saved by using models/components others have created. Go to: File>3D Warehouse>Get Models and search for what you want. Once imported into your model, they can be edited as you like. You can also share models/components you create, Go to: File>3D Warehouse>Share Model
11. To apply a material, Go to: File>Window>Materials, the Select button should be highlighted, from this dialogue box numerous standard materials can be applied by selecting a material and then using the paint bucket to select the model pieces to receive the material. Be sure to select the Shaded With Texture button in the Styles toolbar or you won’t see the material.
a. Once a material is placed it can be edited, Go to: File>Window>Materials, the Edit button should be highlighted, from here you can edit the color, scale, and opacity of the material. You can also use your own images to create materials or images from a manufacturer’s website.
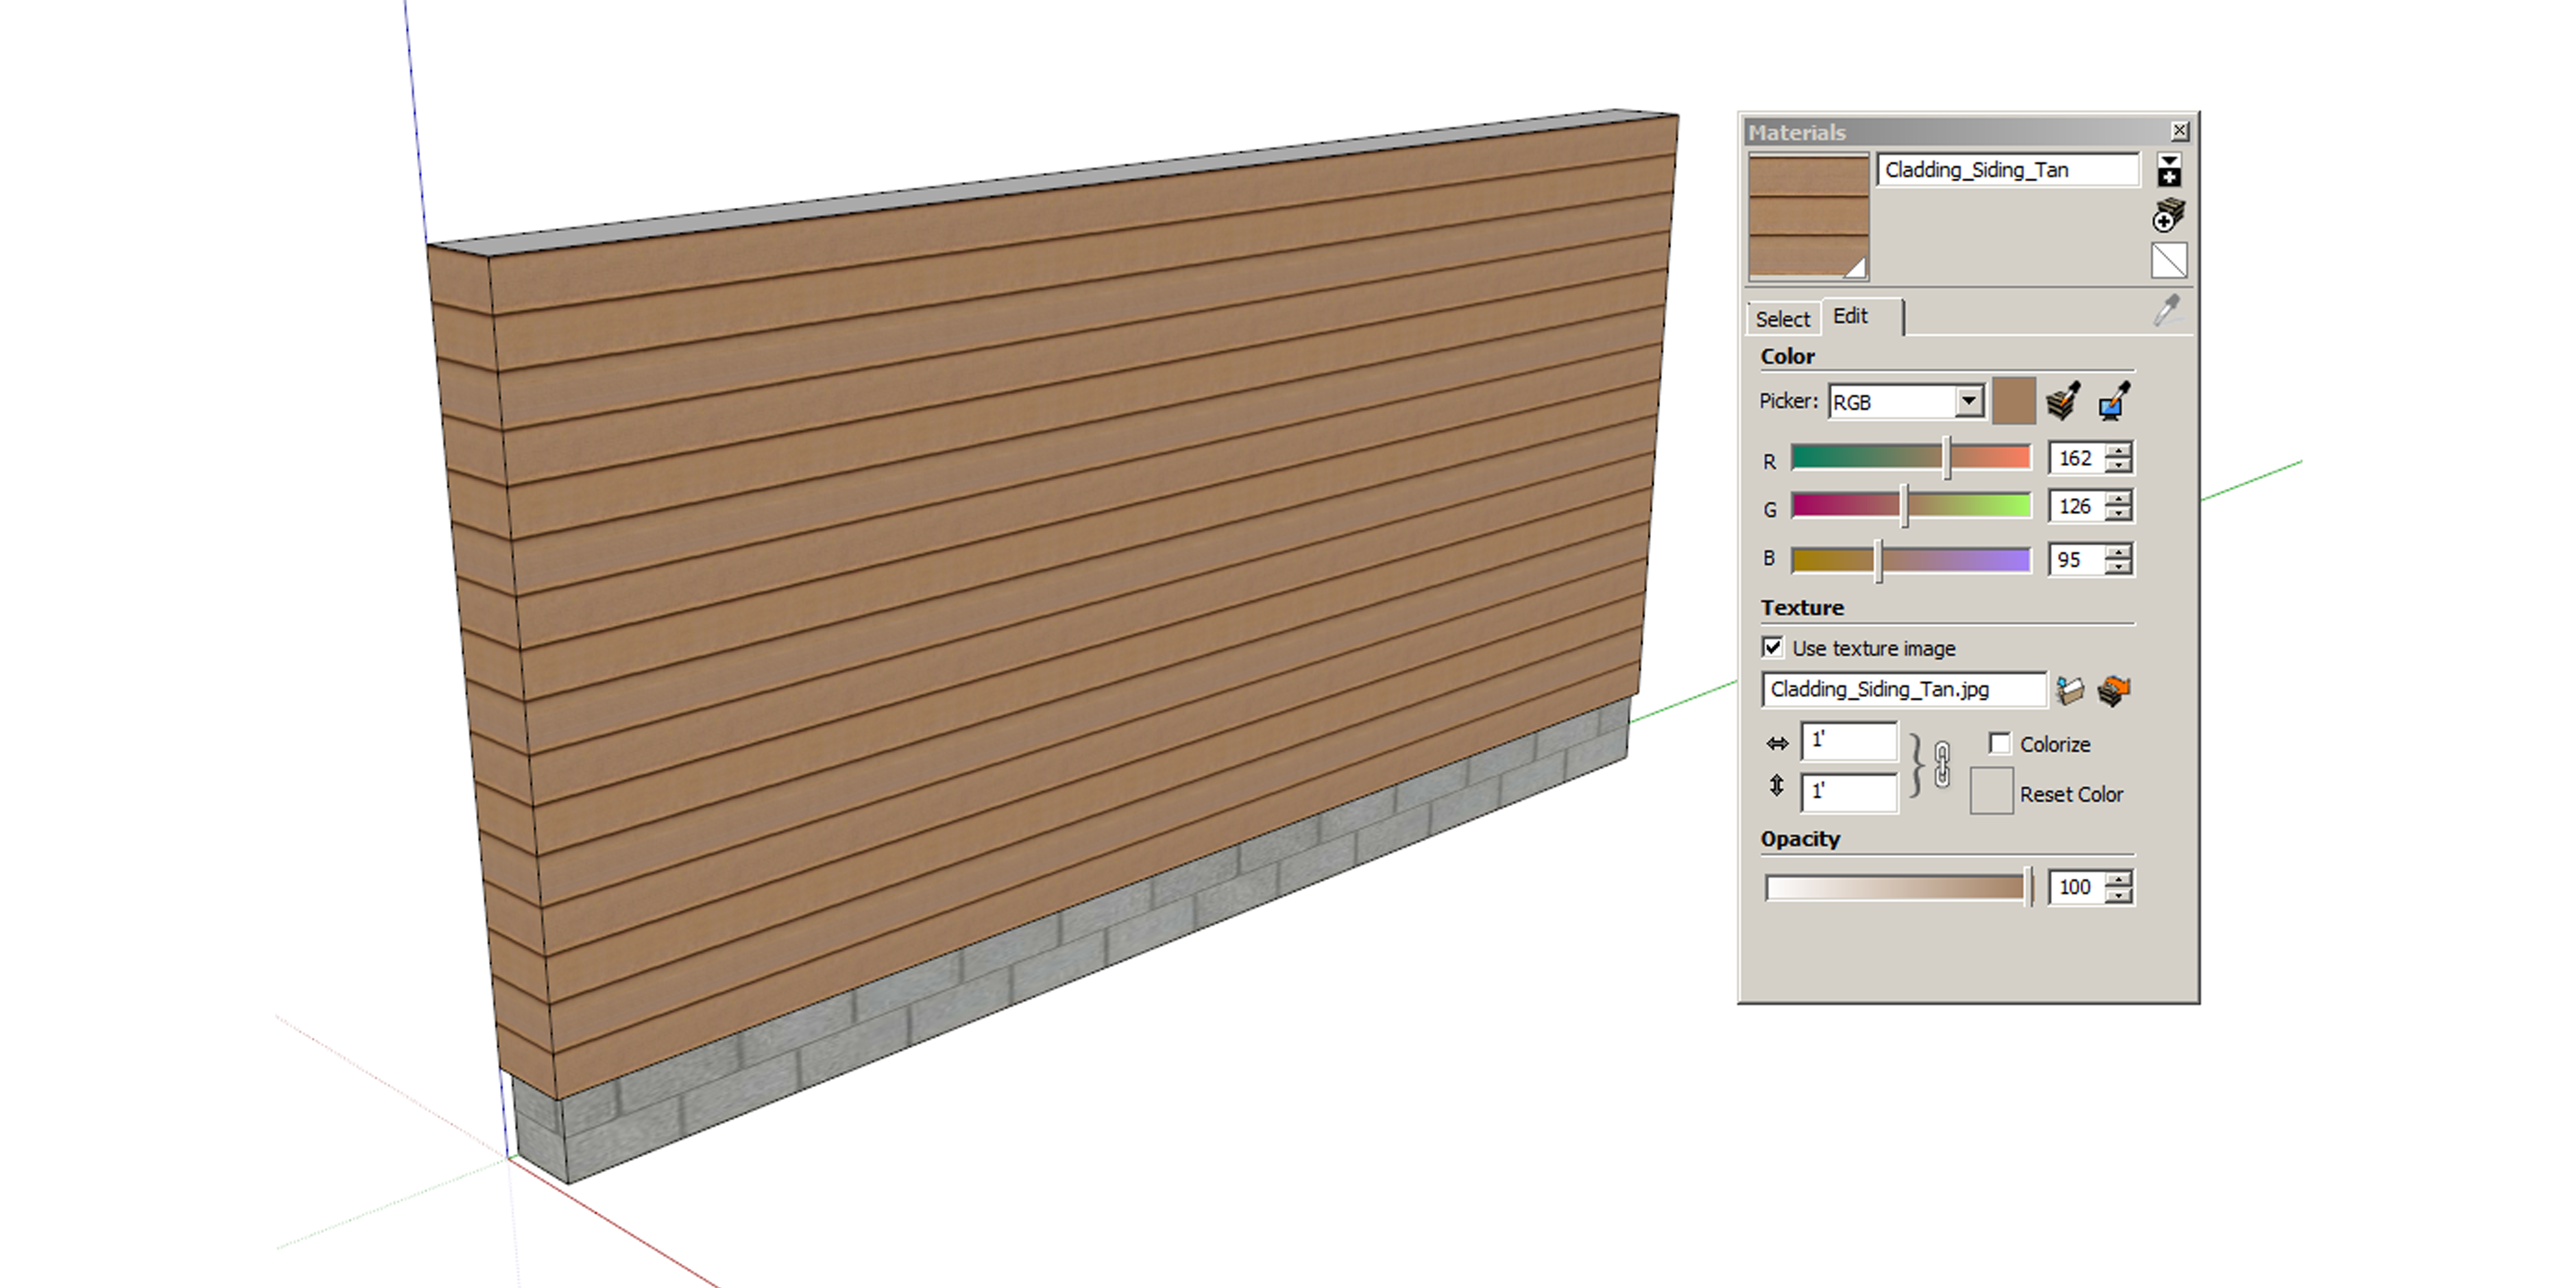
b. After placing materials, you can edit them in the model by right-clicking on the material and selecting Texture>Position (if you right-click again there are some additional options). Four colored ‘pin’ tools appear that allow you to modify the position and scale of the material. The two most commonly used are the Green ‘pin’ which allows scaling and rotating of the material and Red ‘pin’ which allows moving of the material. Using these ‘pins’ allows scaling of the material to match a known dimension and placing the material at a ‘starting’ point.

Views and Animations
1. Once you determine vantage points that highlight your model, you’ll want to save the views (called ‘Scenes’) for printing, exporting, or creating animations. To create a scene, Go to: View>Animation>Add Scene, a new tab will be created at the top of the work area. Right clicking the tab allows you to update the scene to the current view. Right clicking a Scene tab also allows you to open the Scene Manager, from here you can rename your Scene and choose which properties are to be saved in the Scene. You also select if the selected Scene is included in an animation or not.

2. Animations can be created from a selection of Scenes, Go to: View>Animation>Settings to set the Scene Transition and Scene Delay times. To play the Animation, Go to: View>Animation>Play or right-click a Scene tab and select Play Animation. Note, Animations will play the Scenes from Left-to-Right. If need be Scenes can be re-organized by either right-clicking a Scene tab and selecting Move Right or Move Left, or from within the Scene Manager Dialogue Box.

Plugins and Scripts
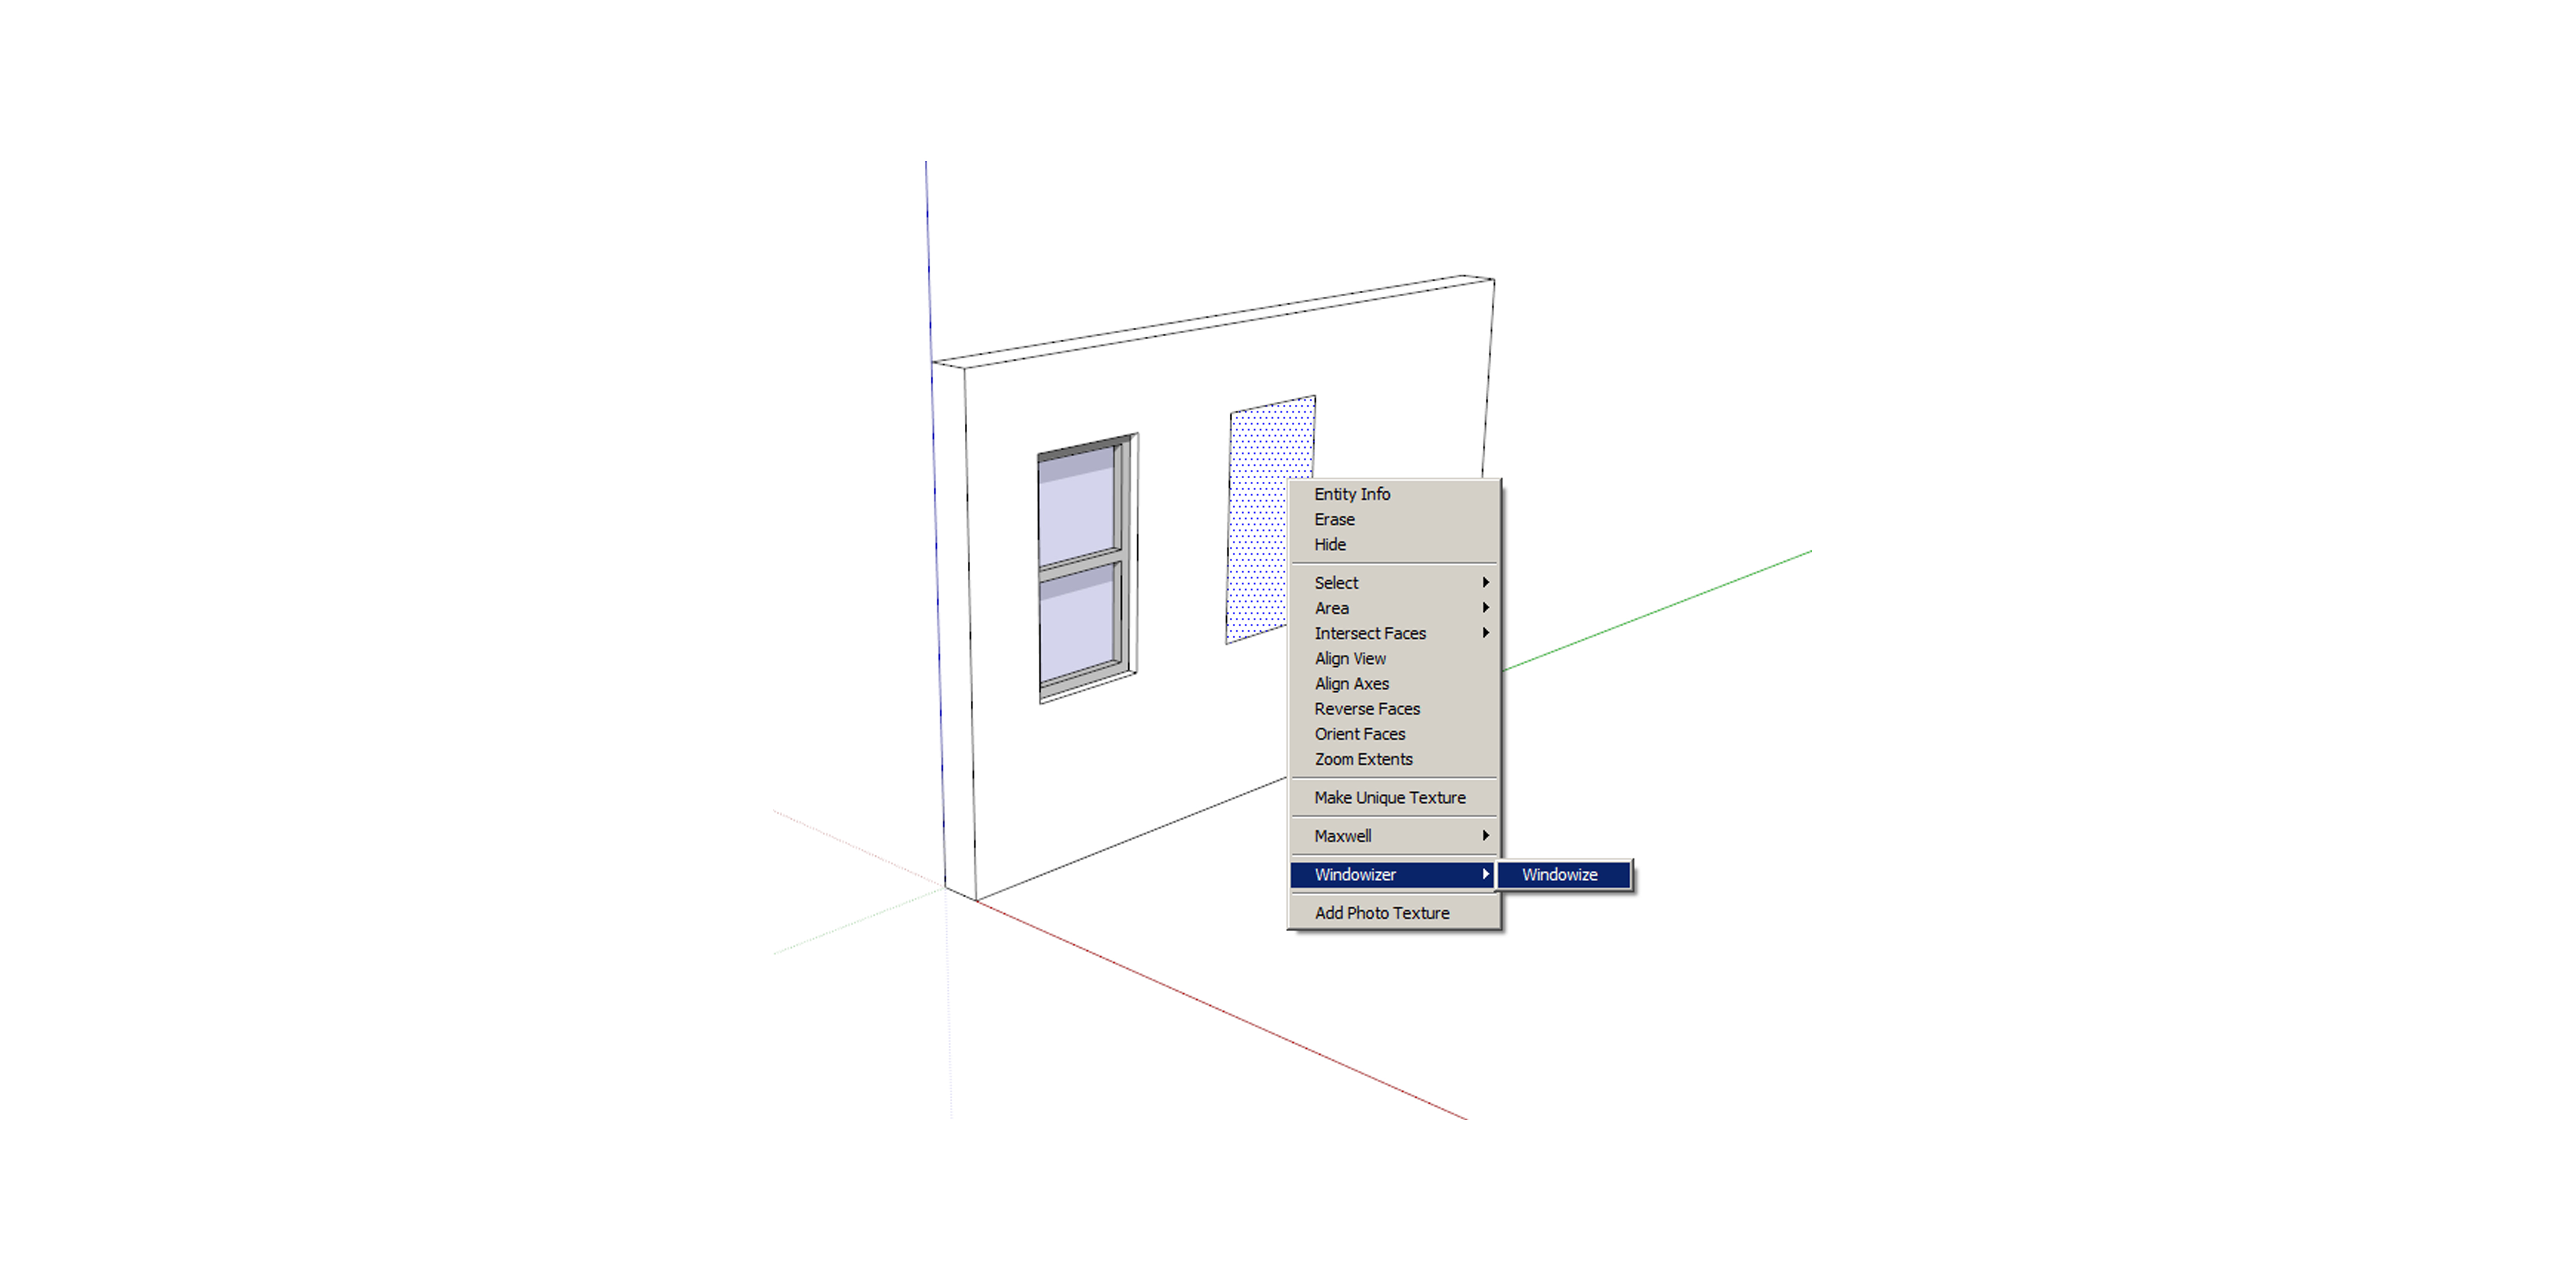
1. There are several plugins/scripts that can be downloaded to enhance the use of SketchUp. A few of my favorites are:
a. Windowizer- allows you to create windows from a shape.
b. Stairs- there are several available to quickly create stairs

c. Roof- allows you to create various roof configurations

d. Joists- creates floor or roof joists

Styles
1. Styles apply filters to your model to give them various looks, such as a hand-drawn look. To apply a style, Go to: Window>Styles> select the left tab Select, now you can view various styles and apply them to your model. From here you can also create your own Style. With a slight bit of research, you can find numerous Styles to download for your use.

Original Model:

Model After Applying Style:

Armed with this information one should feel comfortable using SketchUp, even if you’ve never used it before. For regular users, hopefully this serves as a refresher of the SketchUp basics. Once you start using SketchUp on a consistent basis, you’ll realize that there is a lot more you can do with SketchUp and a lot more tools/ information to learn. You’ll also realize that there is almost nothing that you can’t model in SketchUp. SketchUp is an invaluable design tool and should be in the ‘toolbox’ of every designer.
So what tips/advice do you have for SketchUp? Post them in the comment section, I’d love to learn some new tips and read how others use SketchUp.

Design On,

** go download SketchUp and get your 3d on!

In your section about Groups & Components, you can also mention about “Make Unique”. I used this quite often when, after starting out with the 40 typical units of whatever, the design then changed to where one or a few of the units had to be uniquely modified. I would still start as a typical component, and then change as necessary.
Good point… I’ve thought about doing additional posts where I discuss tools a bit more in depth. It was hard to decide what to include and not include.
Hello,
Can I republished it in http://www.sketchup-ur-space.com, an exclusive e-magazine for worldwide sketchup users?
Sure, as long as credit is given to me.
nice
Thanks for reading and the comment!
Thanks for the tips! While I use Sketchup a bit, there were a couple of good pointers here that I wasn’t aware of!
As a landscape architect I find sketchup is a good tool to show a landscape in 3D and also to get my head around designing levels in a landscape. For ‘selling’ a design to a client, Sketchup is much better than the Cad programs we use!
Jason, thanks for reading and commenting, glad you got a tip or two out of it. For the cost, you can’t beat SketchUp!
I thought I was the last SketchUp user left since the great BIM exodus. Glad to see somebody else is still over on the other end of studio with the light on! We should have coffee some time, I’m a Triangle architect, too.
Thanks for reading… yup, I still use sketchup, it’s a great design tool. Coffee sounds good.
I WANT TO LEARN MORE
Thanks, I may so some follow up posts covering different tools/methods.
How much is Sketchup’s renewal fee?
There isn’t one with the free version, which I’ve always used.
I’m even more impressed. I thought you were using Pro.
Nope, the freebie works well for me!
Do you mind if I quote a few of your posts as long as I provide credit and sources
back to your site? My website is in the very
same area of interest as yours and my visitors would truly
benefit from some of the information you present here.
Please let me know if this alright with you. Thank you!
As long as you give credit and link back, go for it…thanks for reading my blog!
Nice Tutorial ! I love Sketchup that I studied another software to make it Interactive. Check out my Blog http://sketchuptodirector.blogspot.sg/
Thanks!
Pingback: Less is More- Blog Review 14 | Architect's Trace
Pingback: SketchUp 102- Groups and Components | Architect's Trace
Pingback: 5 for Architect’in | Architect's Trace
Hi there! It’s difficult to find anything interesting about this topic (that is not overly simplistic), because everything related to 3D seems very difficult. You however sound like you know what you’re talking about 🙂 Thank you for spending your time writing some relevant content for us!